Creating a Custom Node Group
1
Navigate to Infrastructure
From your Porter dashboard, click on the Infrastructure tab in the left sidebar.
2
Select your cluster
Click on Cluster to view your cluster configuration and node groups.
3
Add a node group
Click Add an additional node group to open the node group configuration panel.
4
Configure the node group
- Cost Optimization
- Fixed Node Groups
Cost Optimization for Node Groups
Set your maximum CPU cores limit to prevent unexpected scaling. This helps prevent unexpected cost increases by setting a cap.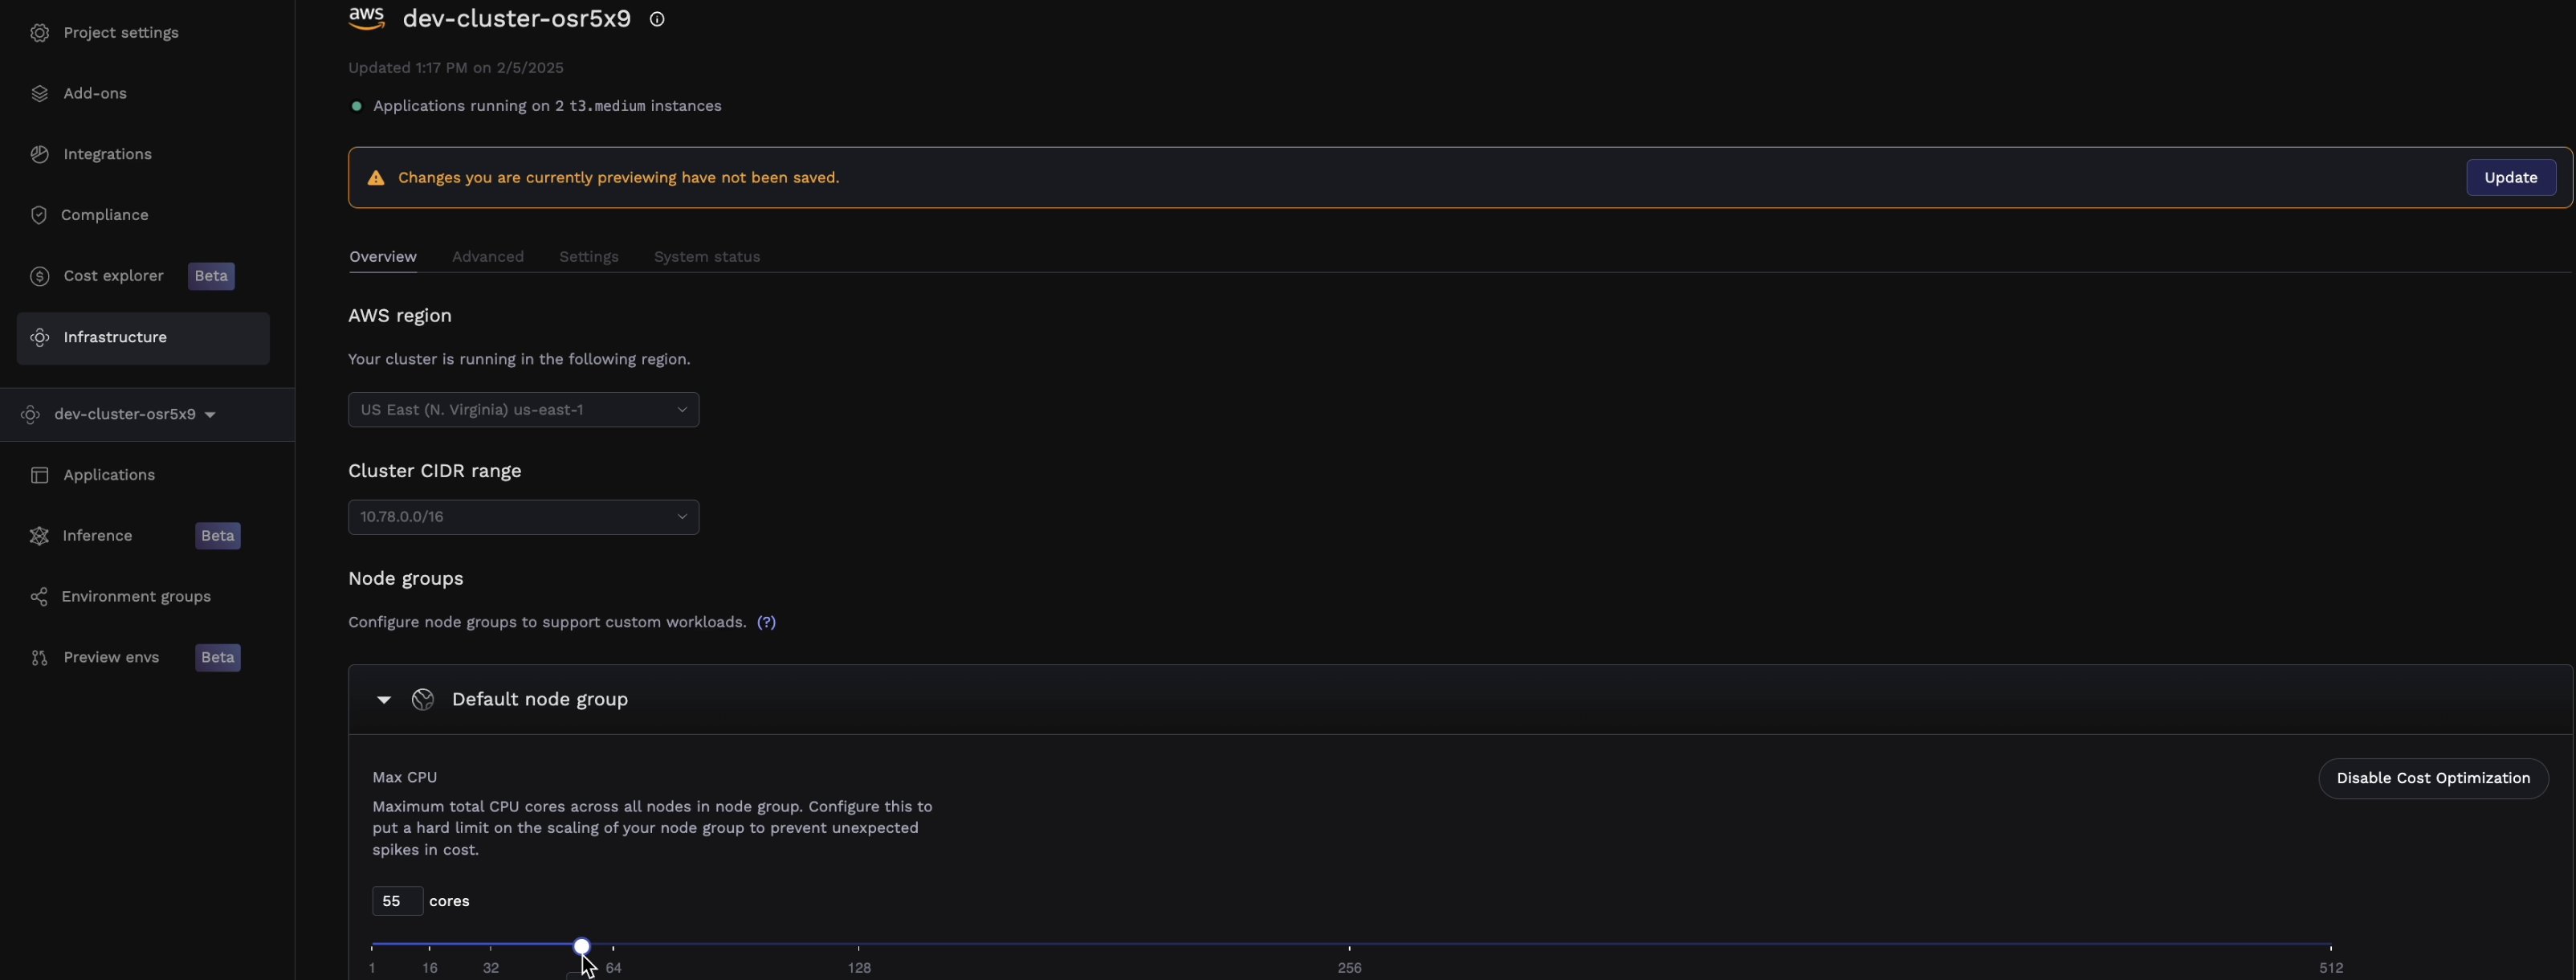
Limitations
The following node group configurations should continue using fixed instance types until we support cost optimization for them:- GPU instances (e.g., instances with NVIDIA GPUs)
- Spot instances
- Instances in public subnets
- Instances with specialized hardware requirements

Health Checks Required: For production applications, ensure proper health checks are configured before scheduling them on cost-optimized node groups. This ensures your applications can be safely rescheduled on new nodes without causing any disruption as nodes are reshuffled.
5
Save and apply
Click Save to create the node group. Porter will provision the new nodes in your cluster. This may take a few minutes.
Assigning Workloads
Once your custom node group is created, you can assign applications to run on it:- Navigate to your application in the Porter dashboard
- Go to the Services tab
- Click the service you want to assign
- Under General, find the Node group selector
- Select your custom node group from the dropdown
- Save and redeploy your application
Deleting a Node Group
To remove a custom node group:- First, migrate any workloads running on the node group to another node group
- Navigate to Infrastructure → Cluster
- Find the node group you want to delete
- Click the delete icon and confirm